
I’ve been focusing on making Angular tutorials, but I want to try a new framework called Svelte. Similar to React or Vue, Svelte allows you to build your web applications and promises improved performance.
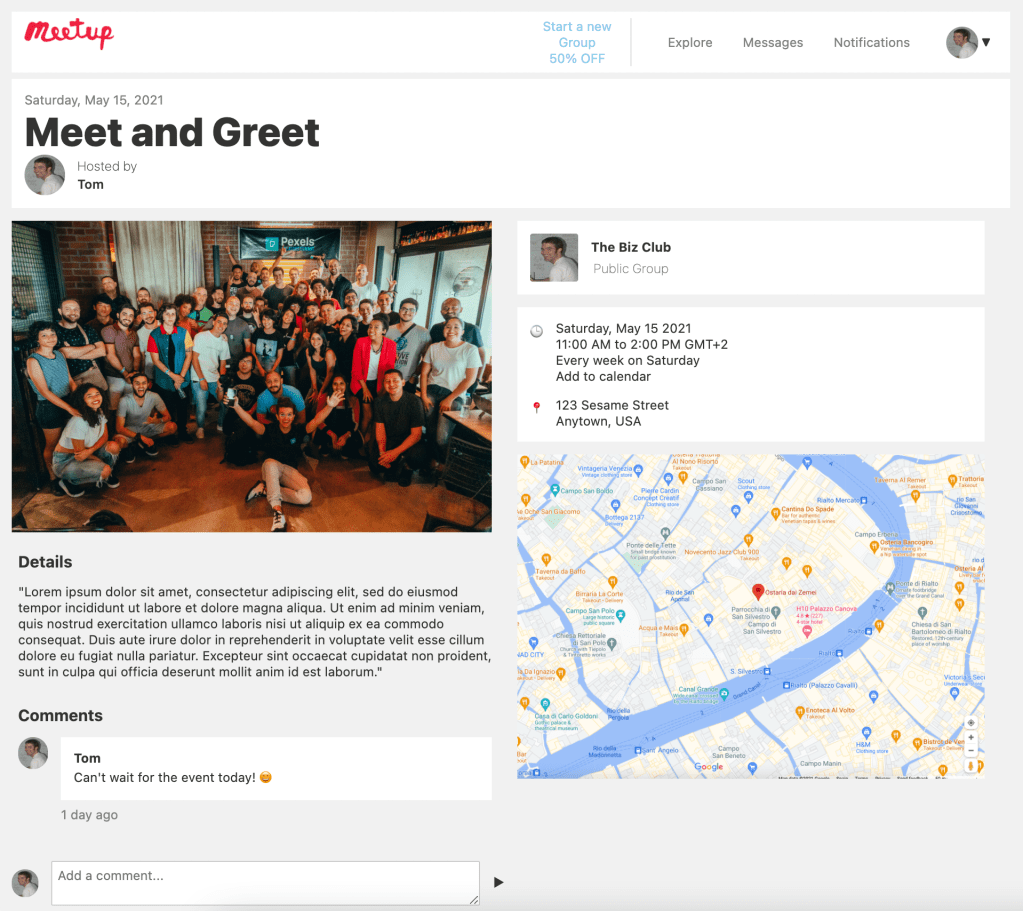
So let’s try out Svelte by making a clone of the Meetup website:
Let’s set the project up with TypeScript and build a simple layout with an interactive component. Ready?
Preqrequisites
- Basic HTML and CSS/SCSS knowledge
- Experience with TypeScript
Source Code
I highly recommend cloning the completed result to play around with it. Keep reading for an explanation of the initial setup of the project as well as the behavior of the code involved. Clone the project here:
https://github.com/LucyVeron/meetup-clone
Procedure
First let’s install Node and npm:
- Node: https://nodejs.org/
- npm: https://www.npmjs.com/
Now, we’ll create a new Svelte project:
npx degit sveltejs/template meetup-clone
This creates a basic template project using npx, a tool used to execute npm package binaries.
Now go into the project’s root directory and add TypeScript to the project by running the magic script:
cd meetup-clone
node scripts/setupTypeScript.js
If you are using Visual Studio Code, add the Svelte for VS Code extension for syntax highlighting and other neat perks.
Let’s install the node-sass module so we can use SCSS for styling:
npm i node-sass
Install the rest of the npm dependencies:
npm i
…and run the local development server:
npm run dev
Now open localhost:5000 in your browser to see the HELLO WORLD page:
We’ll make a really basic layout of a Meet and Greet event with one feature to showcase some of Svelte’s capabilities. All the code including the HTML, CSS, and TypeScript will be written on a single page, App.svelte. The basic empty structure looks like this:
App.svelte
<script lang="ts">
	// TypeScript goes here
</script>

<main>
	<!-- HTML goes here -->
</main>

<style lang="scss">
	// CSS goes here
</style>
HINT: Make sure to add lang=”scss” to the style tag if you are using SCSS!
We’ll add one piece of logic to the app: writing and posting comments. We will allow the user to type a comment, click the send button, and see their new comment added. This is really easy to do: just append a new comment to an array of comments. See the logic here:
App.svelte
<script lang="ts">
    // Type interface for comment object
    interface Comment {
        poster: string;
        comment: string;
        time: string;
    }

    // Your new comment to add
    let draft = "";

    // Existing Comment array
    let comments: Comment[] = [
        {
            poster: "Tom",
            comment: `Can't wait for the event today! 😀`,
            time: "1 day ago",
        },
    ];

    function postComment(): void {
        // Object of type "Comment"
        const newComment: Comment = {
            poster: "John Doe",
            comment: draft,
            time: "Just now",
        };

        // Spread operator to add new comment
        comments = [...comments, newComment];

        // Reset the draft box
        draft = "";
    }
</script>
We’ll bind the value of the user’s draft to a textarea element:
<textarea
   placeholder="Add a comment..."
   bind:value={draft}
   class="draft__box"
/>
Add the click event to the send button, which triggers the postComment function described earlier:
<div class="draft__button" on:click={postComment}>►</div>
Here’s the comment posting functionality in action:
Find the complete HTML, CSS and TypeScript here:
https://github.com/LucyVeron/meetup-clone
Conclusion
We only covered a few basic features of Svelte. Check out the official Svelte tutorial for a comprehensive walkthrough of the framework.