
Angular Gridster2 is a fun and useful library available to Angular developers who wish to implement a tiling feature in their app. Today we’ll make an interactive online CV.
Procedure
First, we’ll need to set up your environment. If you don’t already have them, go ahead and install the latest stable versions of Node and npm.
- Node: https://nodejs.org/es/
- npm: https://www.npmjs.com/
Next we’ll get our Angular project up and running. Install the Angular CLI tool, which will help us manage our project:
npm install -g @angular/cliCreate a new project with the ng new command:
ng new my-cvNow install Gridster through npm:
npm install --save-dev angular-gridster2We’ll create some sample tiles which can be dragged and resized:
app.ts
import { CommonModule } from '@angular/common';
import { Component } from '@angular/core';
import { MatDialog } from '@angular/material/dialog';
import { GridsterConfig, GridsterModule, GridType } from 'angular-gridster2';
@Component({
selector: 'app-root',
imports: [GridsterModule, CommonModule],
templateUrl: './app.html',
styleUrl: './app.css',
})
export class App {
public options: GridsterConfig = {};
public dashboard: Array<any> = [];
constructor(public dialog: MatDialog) {}
ngOnInit() {
this.options = {
gridType: GridType.Fixed,
fixedColWidth: 200,
fixedRowHeight: 200,
resizable: { enabled: true },
draggable: { enabled: true },
};
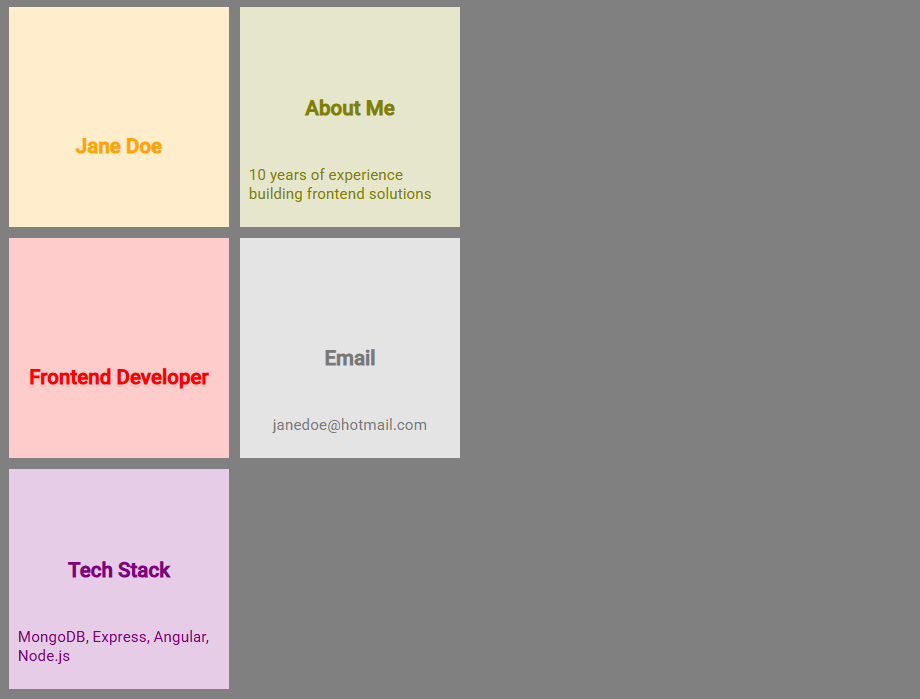
this.dashboard = [
{
config: { color: '255, 165, 0', text: 'Jane Doe' },
},
{
config: { color: '255, 0, 0', text: 'Frontend Developer' },
},
{
config: {
color: '128, 128, 0',
text: 'About Me',
description: '10 years of experience building frontend solutions',
},
},
{
config: {
color: '120, 120, 120',
text: 'Email',
description: 'janedoe@hotmail.com',
},
},
{
config: {
color: '128, 0, 128',
text: 'Tech Stack',
description: 'MongoDB, Express, Angular, Node.js',
},
},
];
}
}
app.html
@if (!dashboard.length) {
<div matRipple class="add-panel">hi</div>
} @if(dashboard.length) {
<gridster [options]="options">
  @for(item of dashboard; track item) {
  <gridster-item [item]="item">
    <div
      class="card-content"
      [ngStyle]="{
        'color': `rgb(${item.config.color})`,
        'background': `rgba(${item.config.color}, 0.2)`
        }"
    >
      <h3>{{item.config.text}}</h3>
      <p>{{item.config.description}}</p>
    </div>
  </gridster-item>
  }
</gridster>
}
app.css
.card-content {
  height: 100%;
  box-sizing: border-box;
  display: flex;
  justify-content: end;
  align-items: center;
  gap: 8px;
  flex-direction: column;
  padding: 8px;
}

p {
  font-size: 14px;
}
And the final result should look like this:
Conclusion
We just did a short and sweet example of how to use Angular-Gridster2 to implement a sleek and professional CV. I hope this has been insightful and will inspire you to create your own project. Happy Coding!
