
“Let your forms celebrate success.”
Angular v20 brings enhanced performance, improved hydration for SSR, and refined control flow syntax. But beyond the serious features, let’s have some fun. In this post, you’ll learn how to add canvas confetti to your Angular app and trigger it when a user successfully submits a form using Reactive Forms.
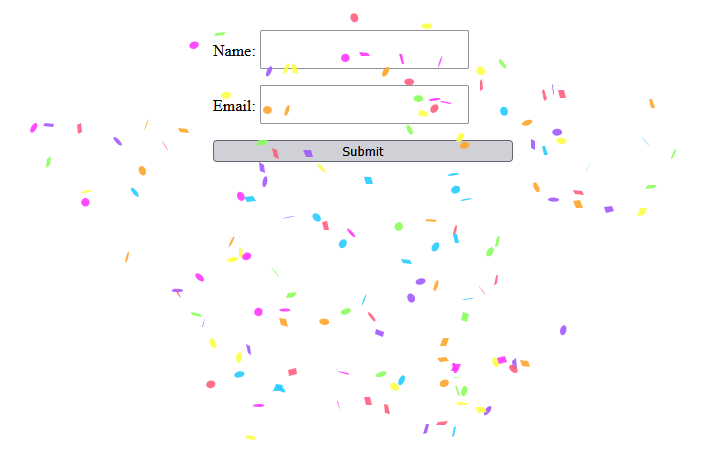
By the end, you’ll have a form that throws a mini celebration upon success.
🎯 What You’ll Build
A simple user sign-up form that:
- Uses Reactive Forms
- Validates input
- Fires off canvas confetti when the form is submitted successfully
🧱 Prerequisites
Make sure you’re using Angular v20. If not, upgrade with:
ng update @angular/core@20 @angular/cli@20Then install the confetti library:
npm install --save canvas-confettiInstall the Types if using TypeScript:
npm i --save-dev @types/canvas-confetti🔧 Step 1: Set Up Reactive Forms
First, create a new Angular project with the cli tool:
ng new my-confettiThen set up the form in app.ts:
import { Component } from '@angular/core';
import { FormBuilder, FormGroup, ReactiveFormsModule, Validators } from '@angular/forms';
import confetti from 'canvas-confetti';

@Component({
  selector: 'app-root',
  imports: [ReactiveFormsModule],
  templateUrl: './app.html',
  styleUrl: './app.css',
})
export class App {
  public form: FormGroup;

  constructor(private fb: FormBuilder) {
    this.form = this.fb.group({
      name: ['', Validators.required],
      email: ['', [Validators.required, Validators.email]],
    });
  }

  onSubmit() {
    if (this.form.valid) {
      this.launchConfetti();
      console.log('Form Submitted:', this.form.value);
      this.form.reset();
    } else {
      this.form.markAllAsTouched();
    }
  }

  launchConfetti() {
    confetti({
      particleCount: 150,
      spread: 70,
      origin: { y: 0.6 },
    });
  }
}
🖼️ Step 2: Add the HTML Template
In app.html, build your form UI:
<form [formGroup]="form" (ngSubmit)="onSubmit()" novalidate>
  <label>
    Name:
    <input formControlName="name" />
    @if (form.get('name')?.invalid && form.get('name')?.touched) {
    <span> Name is required. </span>
    }
  </label>

  <label>
    Email:
    <input formControlName="email" />

    @if (form.get('email')?.invalid && form.get('email')?.touched) {
    <span> Enter a valid email. </span>
    }
  </label>

  <button type="submit">Submit</button>
</form>
🎨 Step 3: Add Some Basic Styling
In app.css:
form {
  display: flex;
  flex-direction: column;
  gap: 1rem;
  max-width: 300px;
  margin: 2rem auto;
}

input {
  padding: 0.5rem;
  font-size: 1rem;
}

span {
  color: red;
  font-size: 0.8rem;
}
🧪 Step 4: Try It Out
Run your app with ng serve.
Fill in the form with valid values.
Hit Submit and enjoy the burst of confetti! 🎊
📦 Wrapping Up
With Angular 20 and a dash of canvas-confetti, your forms don’t have to be boring. Reactive Forms give you powerful validation and structure, and confetti brings the celebration.
Let your UI celebrate your users’ success. Happy Coding!
